
Lo-fi retrowave is a subgenre of synthwave music that includes artists such as HOME, Voyage, Forhill, Hotel Pools, 憂鬱, Unfound, A.L.I.S.O.N and Emil Rottmayer. Lo-fi retrowave combines elements of synthwave, ambient, downtempo and chill wave, but most importantly, they all capture a nostalgic mood. A great place to check out these artists is the Electronic Gems Youtube channel, which curates new tracks, and also features some great retro artwork.
The following is a guest article written by Forhill, a multi-instrumentalist producer based out of Boston, MA. He generously created a short demo for this article, as well as a deep look into how he creates his sounds, from putting together responsive synth patches, shaping them with EQ and using layers of delay to create interesting, wide sounds. All of the synth tracks in the demo are created with u-he Diva, a powerful analog-style hybrid synth that allows you to mix-and-match modules from different classic synthesizers. Another key plugin used is Soundtoys Echoboy, a versatile delay effect that specialises in emulating vintage analog delay effects with a dark, saturated sound. Check out the demo below, followed by Forhill’s writeup on all the individual layers that make up the track.
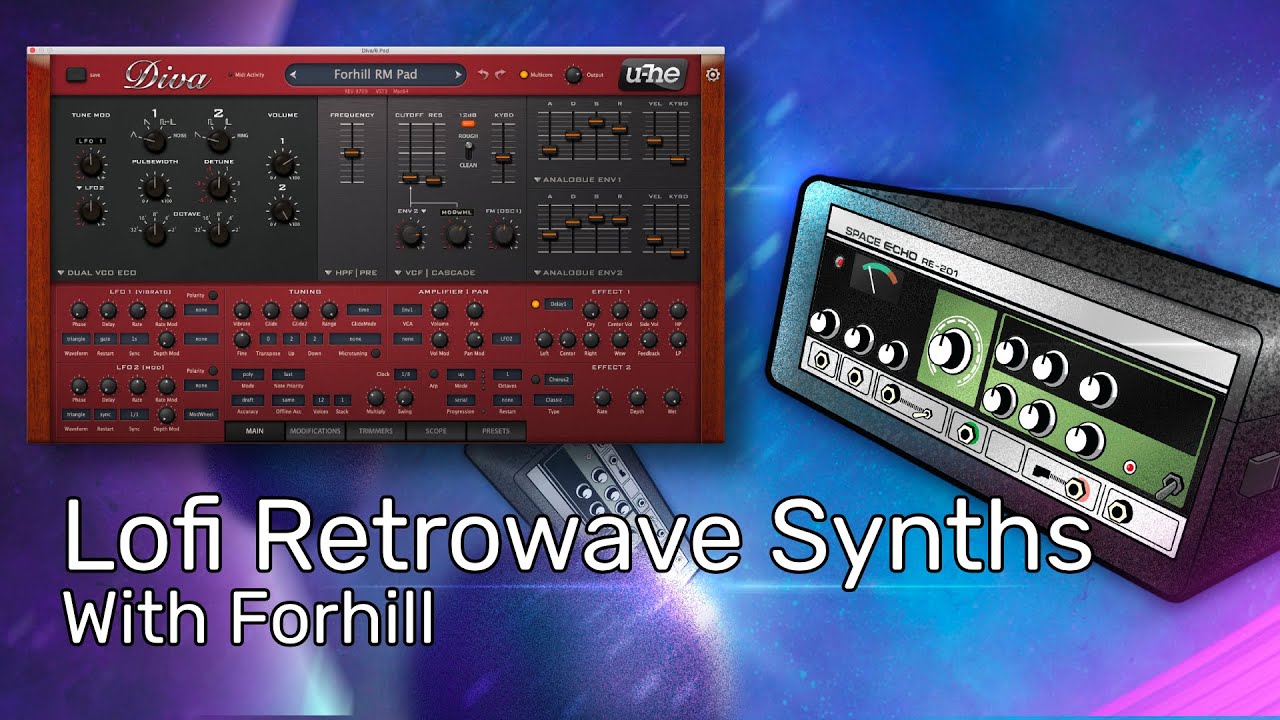
Pad
I like to play with patches that have a long release and let that act as the decay. One reason is that it’s easier to play parts live whilst coming up with ideas, allowing more time to change chords; I also just like the way it lets the sound fade into the reverb and delay. For this demo I played some low chords in Diva and used EQ to remove the low-mid frequencies, leaving just the tops of the chords and some higher harmonics of the low notes, resulting in a light but dense sound.
- Diva Pad Dry00:00
- Diva Pad w/EQ00:00

The panning in the Diva patch is biased to the left channel in the synth so that the dry signal sits on that side of the stereo field. After the heavy low cut EQ, the sound is sent into the delay, in this case, Soundtoys Echoboy, where I started with the Space Echo preset and used LowCut to remove the lower frequencies of the wet signal. I set the balance in the tweak panel so that the wet signal is biased to the right channel. Diva’s panning combined with EchoBoy’s alternately panned wide repeats results in the pad filling out the entire stereo field without anything panned dead center, while also having stereo motion that makes things more interesting to listen to.

Last in the effects chain is a second instance of Ableton’s EQ Eight effect, this time in M/S mode used to remove some of the mid-range frequency content out of the mid channel. This opens up room for other elements in the mix, such as the leads and drums.
- Pad w/Stereo Effects00:00

Chord Stabs
The chord stabs are based on my go-to brass patch. Set the filter attack so you hear it open when playing the notes and use the filter envelope’s velocity fader to set how much the note velocities open the filter envelope. I will usually play chords live and then tweak the individual velocities to taste, generally keeping them on the lower side so that the filter doesn’t open too much. I run most tracks through u-he Satin in Studio mode to add crunch before sending it to a chorus for a little width and softening of the sound.
- Chord Stabs Dry00:00

Ableton’s Echo effect is great for general purpose delays and ping-pong delay is a common technique in this genre, especially used on the chords patch to add rhythm. The delay’s timing will depend on the track and what you want for a rhythm. I use delay on chord pluck patches to lay the foundation of the song harmonically, but also to add to the groove, so it will take some experimenting to dial in the settings for each specific song. A common trick I use is to set the delay to an 8th note ping-pong (left channel ⅛ note, right channel at ¼ note, or vice versa) but have the chords play a dotted 16th rhythm on a ½ bar loop, or something similar.

This gives things a nice bounce, where the synth plays on the beats you want to accentuate but the delay compliments that rhythm when you aren’t playing a chord, creating a shuffle feel. That’s just one example, but I think the key to using delay is not to overplay, and to allow the delayed signal to fill in the gaps between notes and phrases and enhance what’s there, rather than to add clutter to the track.
You also want to use a small amount of feedback in the delay effect so that the chords don’t overlap too much, which could result in a mess when moving between chords. I always filter out the lower frequencies of the wet signal to avoid a muddy build-up, and will sometimes attenuate the high end to differentiate the wet signal from the dry.
- Chord Stabs FX00:00

Lead Pluck
This patch is similar to a noisy pluck sound I’ve been using in some recent tracks of mine, such as Iris. The patch uses Diva’s Dual VCO panel with Osc 1 set to noise at just under 50% volume and Osc 2 set to a saw wave with maximum volume. The noise adds to the transient, but also adds a soft layer on top of the sound which adds some nice texture to the overall tone. Diva’s highpass filter cuts out some of the lower frequencies created by the noise oscillator before the sound is sent to the envelope-controlled lowpass filter for the pluck.
The amplitude and filter envelopes are set up like a typical pluck sound; short attack with a medium decay and low sustain, but with long release times. With this configuration, the sound will be different if you hold a note vs quickly tap it. If you press and hold then the decay will cause the sound to be nice and short, but if you quickly tap the key the envelope’s release will take over instead, and the note will ring out. This, coupled with the envelope’s velocity control, allows for a lot of expression when playing a lead in live. If you write MIDI tracks in the piano roll then I’d recommend playing with note lengths on this patch to see how it can add some spice to things.
- Lead Pluck Dry00:00

The goal of the lead FX processing is to create a big space as well as movement in the stereo field. This starts at the synth level in Diva, where I modulate the Pan Mod with LFO2 and set the modulation depth to determine the amount of stereo movement. This demo is at a slower tempo, so I synced the LFO to the beat (1/1) so that it completes a full cycle every measure. I don’t want the lead to be moving so much that it’s distracting; just enough so that it doesn’t sound static.
Diva’s delay then adds a slow ping-pong effect, with the left channel set to a quarter note and the right channel set to two quarter notes. The delay timing will probably influence what sort of melodies you play because it’s nice to have them play off one another; you don’t want to set things too short so that it clutters up your melodic lines. After Diva, I EQed the synth signal to cut out frequencies I don’t want, mainly low mids and below, as well as boosting the high end a touch, which adds brightness to the noise and saw harmonics.

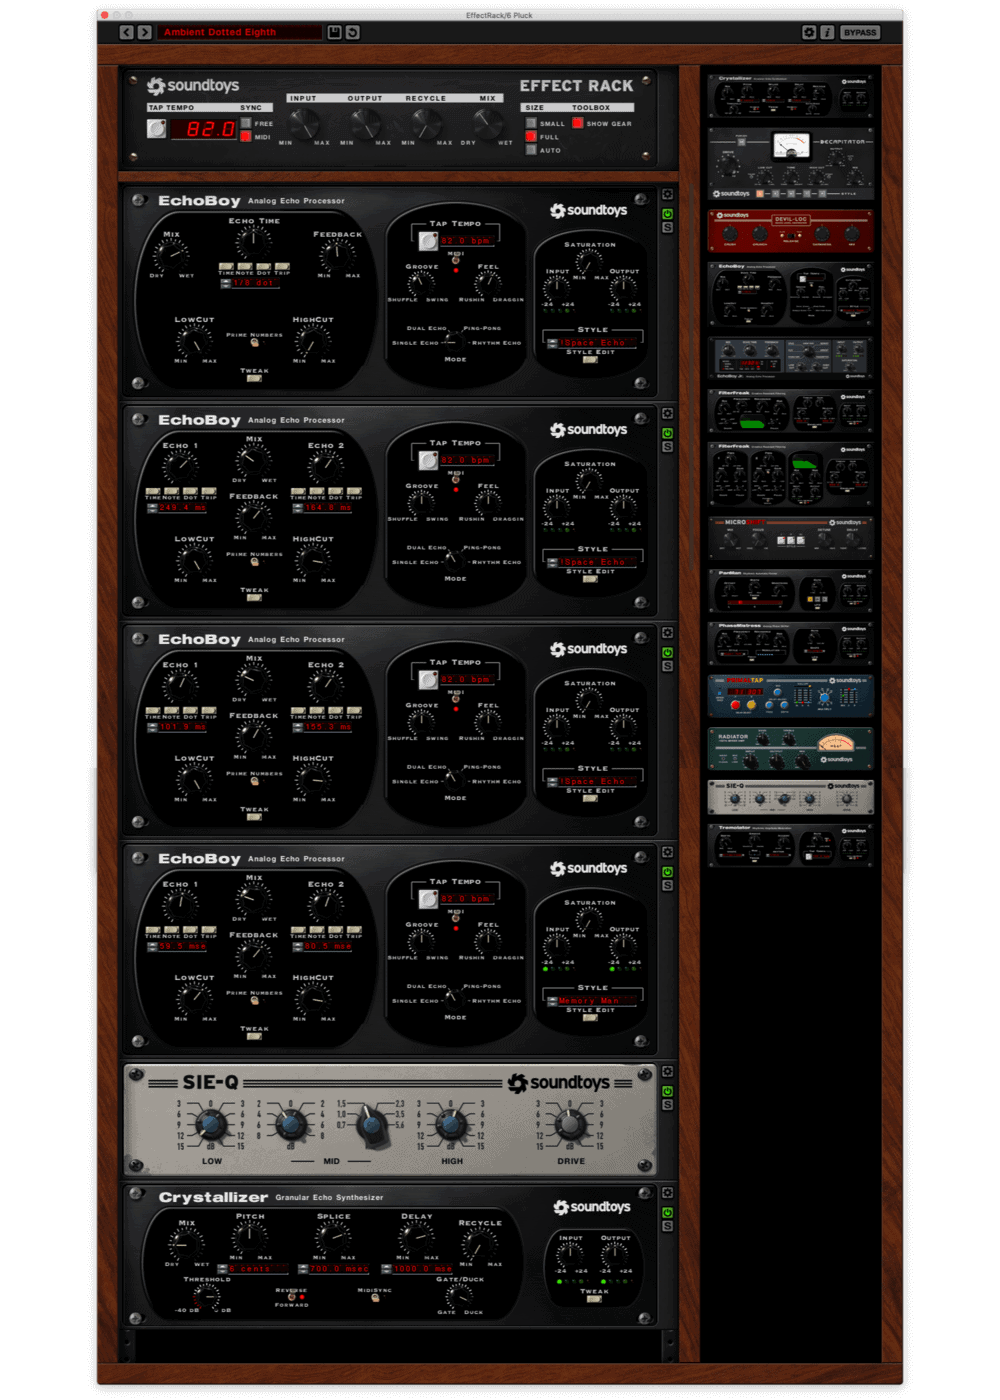
With the synth cleaned up to my liking, I ran it through Soundtoys Effect Rack on the Ambient Dotted Eighth preset. I tweaked the patch by maxing out the low cuts on each instance of EchoBoy, followed by adding EQ and a small amount of Crystallizer, which adds some subtle detail to the note tails. This delay effect is subtle in the overall track mix, but the heavily filtered wet signal adds nice space for the synth to sit, and can be more interesting than using reverb.
- Lead w/Effects Rack00:00
- Effects Rack 100% Wet00:00
Bass
The bass is a basic saw pluck patch created in Diva using the Moog-style Triple VCO oscillators. I like to use Diva for Moog sounds because of the extra control that the analog envelopes offer compared to a more purist Minimoog emulation.

Once the filter envelope is set roughly where I want, I add Ableton’s Saturator to the chain to add higher harmonics, so that the bass can cut through the mix better. I used the A Bit Warmer preset as a starting point, setting gain and wetness to taste, followed by some light EQ to tighten up the low end and pull back the mids. Lastly, I used Ableton’s Glue Compressor for some parallel compression to make it punchier. My bass processing is generally pretty basic; I prefer to have something that just fills out the bottom rather than something that draws too much attention to itself.

I add automation to the filter cutoff in the arrangement to get some subtle movement in the track. This keeps things interesting and lets you accentuate certain phrasing to lean into some notes harder. I try to think of it as if I’m playing a real instrument, not every note would be identical in timing or timbre, so I like to find ways of imitating that in my synth sounds.
- Bass Synth00:00

Drums
I think EQ and Compression are probably the most important tools when shaping the sound of your drums. Most compressors will do just fine, but Goodhertz Vulf Compressor has a distinct sound to it that can do wonders on drum tracks. I typically use that or Arturia’s VCA-65 compressor.
Vulf Compressor’s lo-fi setting applies attenuation to the higher frequencies as well as adding noise and/or crunch depending on the settings in the advanced panel. There are some nice flavors in there depending on what you want; I typically use the Analog type, but the 1980 or 1990 settings can give a more digital crunch akin to some old sampling hardware. I set the compression amount to clamp down on the kick and snare, and then dial the wetness back to around 50% to blend it in with the unprocessed signal.
- Drums Dry00:00
- Drums Processed00:00

When working with hi-hats and shakers I usually apply a random LFO to the pitch and volume within Ableton’s Sampler, typically around 5%, which allows for subtle variation in each hit. Coupled with some light delay, this can help liven up the tops so they are less rigid and robotic. Having plenty of velocity variation in the hat patterns will also help it groove better. Try and think of a live drum track, or pull one up with a groove you like, and think about how each hit in the bar is played and how that translates to velocity mapping within the phrase.


Hi!
Amazing tutorial man! Very illustrative
BTW, would love if you could cover a sound tutorial for this track, "quickly, quickly – Swingtheory", it has a lot of lofi synth textures
How did you get this drum sound? Is thas a plug-in or just samples?
I used the VPROM2 plugin for this but its just emulating old Linndrum machines. If you find Linndrum samples somewhere and repitch the snare + eq and compress like is shown here you should get this sound. Samples From Mars has good packs for old drum machines.
Hello, can you tell me how you treat the kick and snare before hit the Wulf compressor?
Thanks for this article. I’ve been listening to this subgenre a lot lately. It has some dreamy flavour and crackling sounds that are more pleasant to my ears that the some of "on your face and loud" retrowave artists, specially outrun/darksynth. It has a more sophisticated feel that sounds more mature as well.
Is Hi-Fi Retrowave a genre too?
Hi-Fi Futurerave
Cool sounds! Calling this some new genre though is a bit silly. This is just more synthwave, all still inspired by the Boards of Canada style that preceded everything. We all have BoC to thank for all of these styles.
When you wrote BoC for a second I thought you referred to Blue Oyster Cult. 🙂
Ok guys, all music in the chillwave genre will be henceforth simply named "BoC" followed by a number. HOME is obviously BoC#2, A.L.I.S.O.N is BoC#3, Forhill, you’re BoC#18. Please contact Colin for further questions about your BoC status and numerical delineation.
Lolol. I’m not talking about groups or individual musicians, music is music and people will always be inspired by the greats, especially the ones who helped create a new genre like IDM… I guess I’m wondering what’s the qualification nowadays for a band/musician to warrant creation of new genre im electronic music. A curious question.