Mac DeMarco is a Canadian musician known for his brand of old-school-influenced indie music, using a chorused guitar sound, simple arrangements and a varispeed tape sound. After utilising synths for Salad Days’ Chamber of Reflection, synths took on a much bigger role for the 2017 album This Old Dog, with several synth-only tracks. Mac’s main synth to use on recordings is his Roland Juno-60, with a Yamaha DX7 also showing up on several songs and the music video to Another One. In this article, I’ll break down the synths on my five favourite Mac DeMarco songs, and show you how to recreate the sounds in software synthesizers. The main synth I’ll use is TAL U-NO-LX, and all the patches are available as a free download at the end of the article.
Some other great resources for finding out more about Mac’s gear and recording techniques are the Pepperoni Playboy documentary, his Tape Op ‘Varispeed and Beyond’ interview, and the Mac DeMarco Nerds Out About Music Gear video by Reverb.com.
Chamber of Reflection
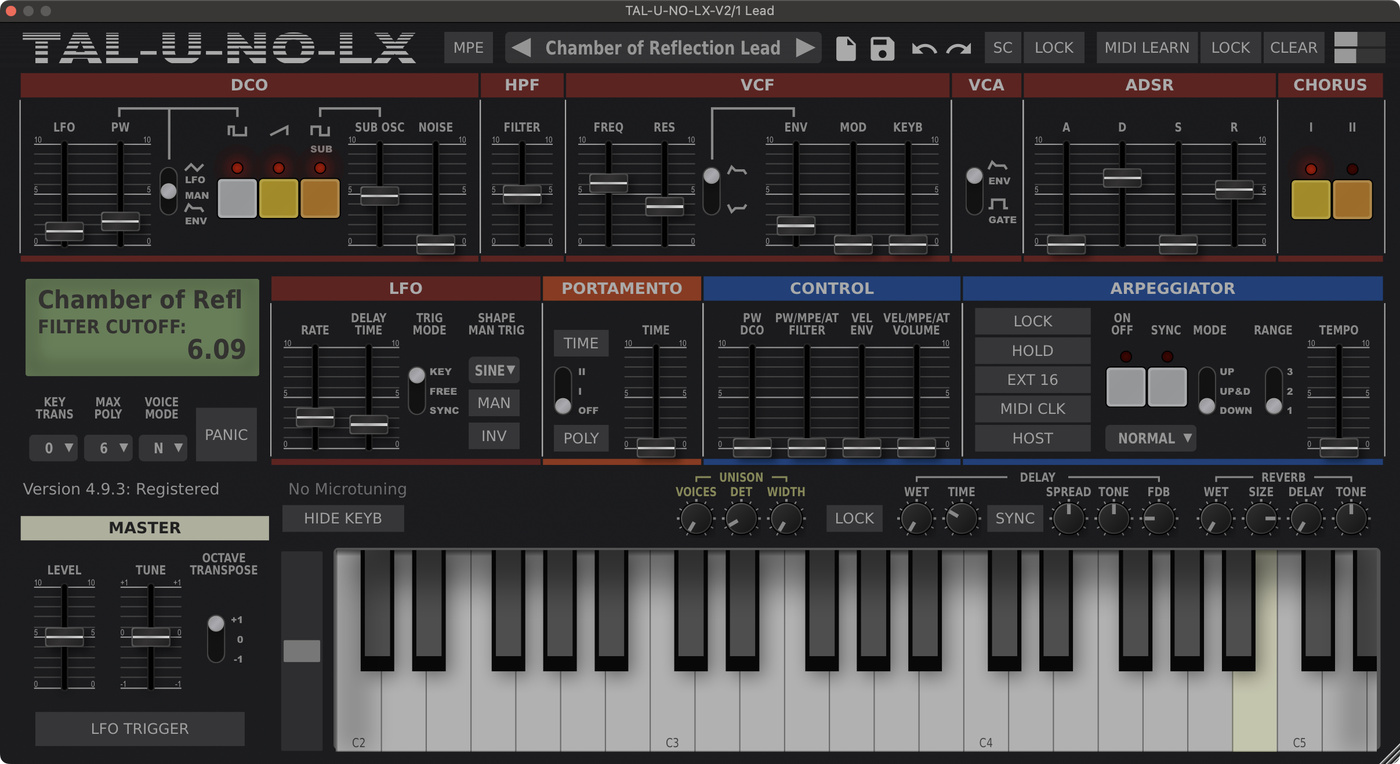
Chamber of Reflection stands out on Salad Days as the only song that replaces Mac DeMarco’s signature chorused guitar with swirling layers of synthesizers. The melody and chords are interpolated from the Shigeo Sekito song The Word II, reworked with vintage synths. The Chamber of Reflection lead synth was recorded on Mac’s Roland JX-3P, a vintage synth with a highly recognisable Roland chorus sound. The patch can be created in TAL-U-NO-LX, a fantastic and inexpensive software emulation of the similar Juno synths.
From the default setting, turn on the square wave DCO and reduce the sub-oscillator volume to halfway. Raise the HPF filter to halfway, which will filter out some of the bass-end frequencies. Set the main VCF filter’s frequency fader to 6 and resonance to 4, which will filter out some of the high-end, but still leave plenty of high-mids. To create some movement in the patch, set the filter’s env fader (envelope modulation) to 2 and set the VCA switch to env, which will set both the filter and the volume to be controlled by the ADSR envelope. Set the decay fader to 7, sustain to 0 and release to 5.5.
For the pitch vibrato, set the oscillator’s LFO fader (at the top-left) to 1.3. This controls the amount of pitch modulation, and finding the sweet spot is the key for many patches. To set the vibrato speed, set the rate fader in the LFO section to 1.24 Hz with a delay time of 0.23. Lastly, turn on the Chorus I effect to complete the sound.
- Chamber of Reflection Lead00:00

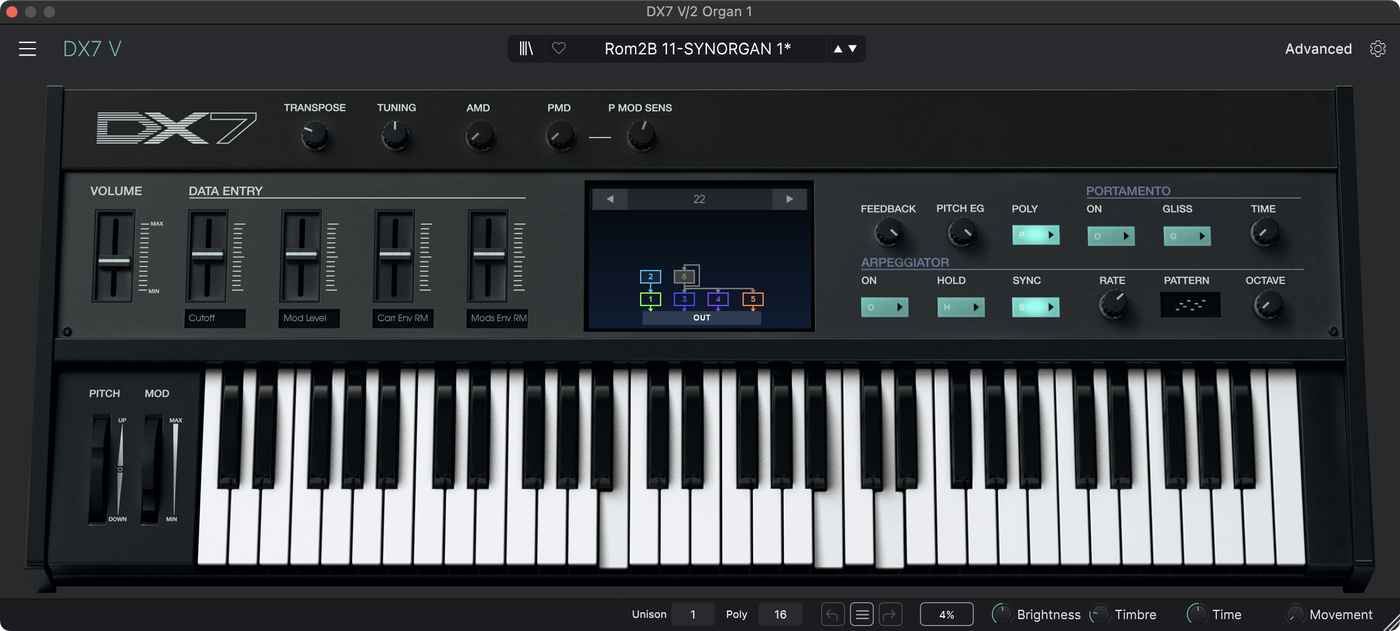
The organ that plays the chords in Chamber of Reflection likely came from Mac DeMarco’s Yamaha DX7, a late-80’s digital synth. The DX7 excels at complex sound design but also has some great organ factory presets. A good software emulation is Arturia DX7 V, which comes with the SYNORGAN 1 preset that may have been used on the original recording. To remove the noisy attack portion of the patch, disable operator 6 by right-clicking it.
- Chamber of Reflection DX700:00

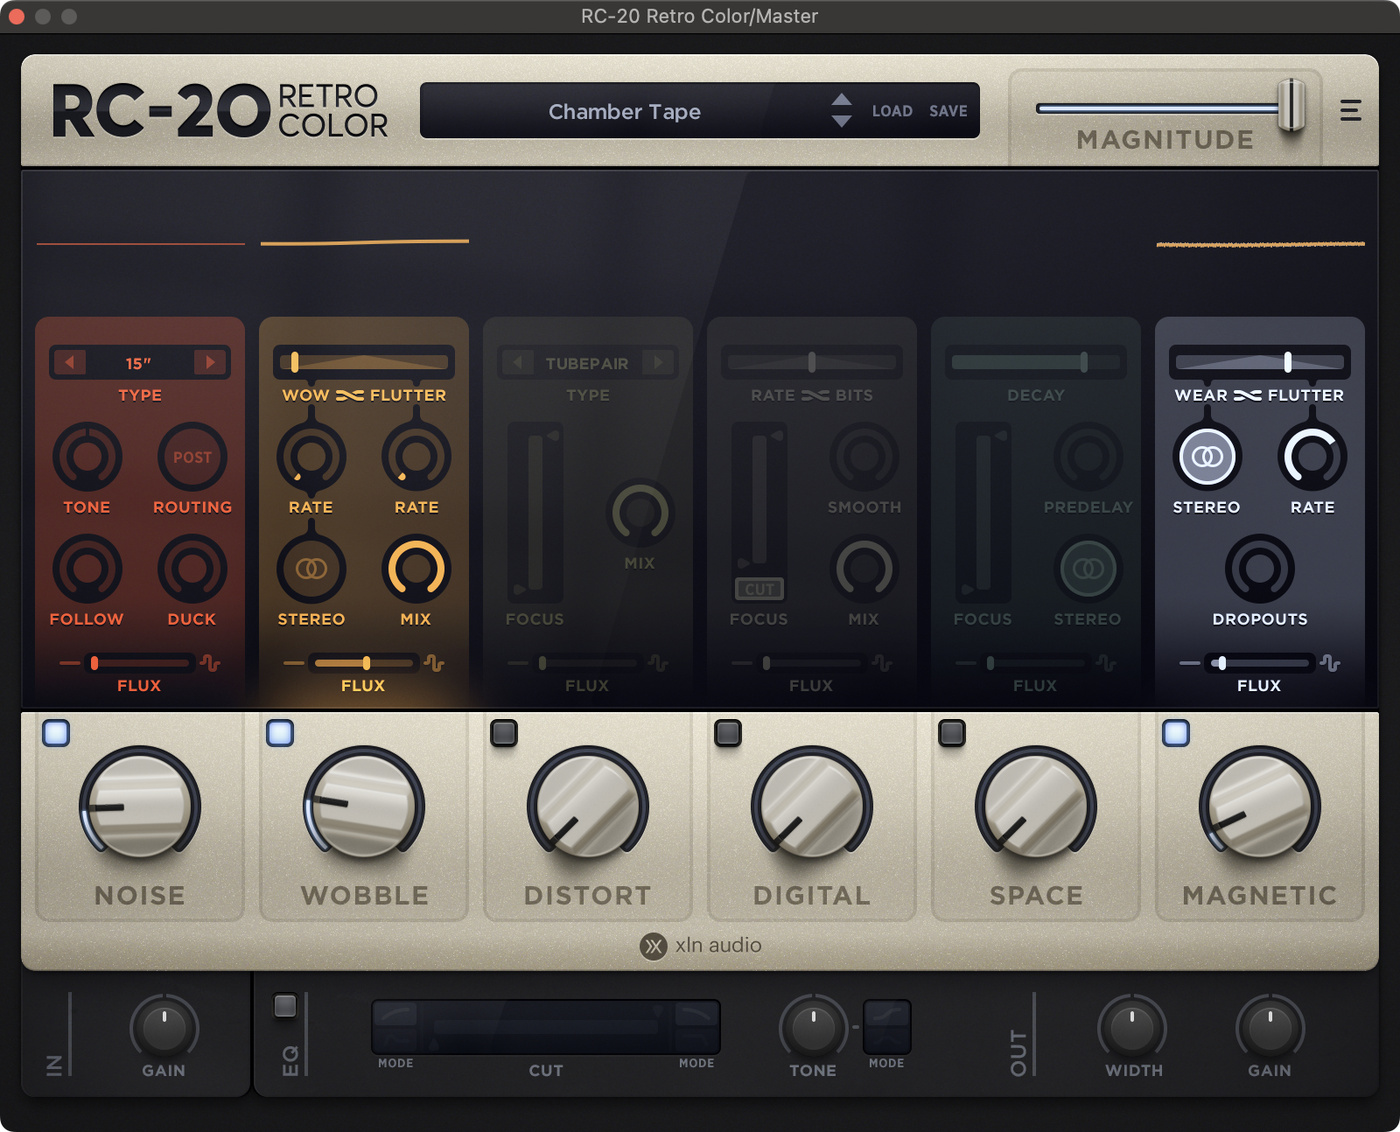
I emulated Mac DeMarco’s reel-to-reel tape recording tone by using EQ on each track to roll off the high-end and low-end. I also used XLN Retro Colour on the master bus to add some pitch vibrato to the whole song as well as tape-style wow & flutter. Mac uses sparing amounts of reverb, and I used Soundtoys LittlePlate on both synth tracks for reverb.

The bass guitar is a Fender P-Bass played with a pick and palm-muting and the drums are from Toontrack Superior Drummer 3 with a heavy slapback delay from Soundtoys Echoboy (75ms delay, 32% mix).

On The Level
On The Level has a similar sound to Chamber of Reflection, with woozy Juno lines over dreamy chords. The chord synth track was recorded with a Roland D-50, specifically the Perc E-Piano preset. I’ve recreated the track using the Roland Cloud D-50 plugin, which uses the same samples as the original hardware. Mac DeMarco’s former bandmate Homeshake is also a fan of the D-50, using it on the track Call Me Up.
- On The Level D5000:00
For the On The Level lead synth, use TAL U-NO-LX and leave the default oscillators in place (sawtooth + full sub-oscillator). Set the filter frequency fader to halfway with resonance and envelope mod settings of around 3. Set up the ADSR envelope with a soft attack of 2, long decay of 7, no sustain and a release time of 6. Finish the patch by setting the VCA mode to env and turning on the Chorus I effect.
The open hi-hats in On The Level can be easily created with white noise and a decay envelope. Shape their tone with EQ (boost the highs, cut the lows) and reverb. There’s also a panning trick in On The Level where the hi-hats alternate between panned left and panned right.

For The First Time
The For The First Time lead synth is created with a quick arpeggio that uses vibrato and a long delay effect to create a woozy trailing sound.
The lead sound is very similar to that in On The Level, with some small adjustments. From the previous patch, switch on the square oscillator, raise the HPF fader to 7 to cut the low-end frequencies. and LPF filters, and increase the ENV release time. This makes the sound a little thicker and a little brighter. In the original track, you can hear the notes being repeated through a delay and this delay being sustained in a ghostly way. This is a cool trick that adds sustain and can be done by running a compressor after your delay.
- For the First Time Lead00:00
The keys sound in For The First Time sound like they came from Juno too, and can be created in TAL U-NO-LX with a single sawtooth oscillator. Set the HPF and main filter frequency faders to 3 with a resonance setting of 2. Setting the keyb fader to halfway will reduce the filter’s keyboard tracking, making the higher notes sound darker compared to the low notes. Set the envelope modulation fader to 3 with decay at 5, sustain at 0 and release at 4, and leave the chorus effect off for this patch.

Another One
The lead synth in Another One uses filter modulation from both the ADSR envelope and the LFO to create a rising-and-falling wave sound that adds an organic feeling to the melody. Use sawtooth, sub and square wave oscillators with HPF set to halfway. Set the envelope modulation fader to 3 and the LFO mod fader to 5. In the LFO section, set trig mode to free and the rate to 0.93 Hz. As you play the melody, you’ll hear the filter rise-and-fall out of time with the tempo, creating a sometimes unpredictable but organic sound.
An interesting thing about the mix is the bass guitar and chords are panned separately left and right. Common advice is to keep the bass instrument dead-centre in the mix, but if The Beatles can pan their bass to the hard sides (check out Something), then it can work.

Watching Him Fade Away
Watching Him Fade Away uses the LFO + envelope modulation trick from Another One and applies it to a synth keys patch. Although it’s a reasonably simple sound, the modulation makes it fun to play. Use a single sawtooth envelope for this one, with the high-pass filter at 3.5. For the main filter, set the cutoff at 1.3 with resonance at 2.
Set the envelope mod amount to 4 with both LFO and keyboard tracking set to 5. This will reduce keyboard tracking and introduce lots of LFO modulation. Set the LFO trig mode to free again with the rate for this patch at 1.32 Hz. Lastly, set the envelope with a small attack time of 1, decay of 6, sustain of 2.5 and no release time (ideally play with a sustain pedal). Leave the chorus off and use a small amount of reverb for the track.


Absolutely loving this article and all of my recent purchases from your site, especially Juno Jazz for Arturia V Collection 9. I was wondering if you had any plans to create an Arturia version of these Mac Demarco patches? I might pick up the TAL soon, but I’m loving Arturia’s Juno at the moment. I would pay good money!!! Haha. Cheers mate.
Also the RM20 is SO GOOD!
I created Arturia versions of Chamber of Reflection and For the First Time which will be released in a free pack for Analog Lab early next year
Color me excited then!!:)
hello how do you load these into ableton live?
You’ll need the TAL U-NO-LX plugin – https://tal-software.com/products/tal-u-no-lx
will these wor in ableton, I cant seem to figure it out
You’ll need the TAL U-NO-LX plugin – https://tal-software.com/products/tal-u-no-lx
don’t know if I will get a reply but, what do you use to make the for the first time lead synth?
It’s a softsynth called TAL U-NO-LX – https://tal-software.com/products/tal-u-no-lx
Pretty new to this so how would I import these to Logic Pro X?
did you ever find out how to do it
you need the TAL U-NO-LX plugin, which you can open in Logic as an AU plugin – https://tal-software.com/products/tal-u-no-lx
More Mac Demarco Synth Sounds @reverbmachine pls and thx xoxox <3
cant open it with fl studio 🙁
Same
You need the TAL U-NO-LX plugin, which you can open in FL Studio as an VST plugin – https://tal-software.com/products/tal-u-no-lx
Wesh, how do you proceed to install those presets in Ableton Live please ????
yo i have my settings exactly the same on my dx7 v plug in but it sounds nothing like the sound you got am I doing something wrong?
Thanks a lot ! Awesome as always 🙂
it’ll be perfect if u can breakdown the music theory part of each songs
Great!!!
Hey thanks for this – love what you do btw.
On Another One keys, are you running this through a tape emulator or something to get that secondary sound?
Thanks
Not tape emulation, but I am using a tape-style delay effect from EchoBoy on it.
Hi, I am on your website every week love it. Was wondering if you could do an article on MGMT’s Little Dark Age album and go over some of those gnarly synths. Thx :^)
hey, where can i get TAL? I’m so confused
https://tal-software.com/products/tal-u-no-lx
Love what you do man, thank you. Question about the Another One lead – there seems to be two different sounds, a delayed stab and then the longer swell. You’ve nailed the swell, but I was wondering how to get the variation with the shorter stabs within the same patch? This same patch is in One More Love Song for reference.
I think the two slightly different sounds you can hear are a result of the filter being modulated with a super-slow LFO, which creates the fade-in effect as it rises. When I saw Mac live I could definitely hear his keys player was creating the rising-and-falling effect from just one patch. You could try closing the filter more and raising the amount of LFO modulation to better create the effect, the only caveat is that it makes the patch a little more unpredictable.
thanks for the response! after thinking about it for a while and watching live videos, this is what I concluded as well, and got it sounding very close 🙂
could you please research the synth on "My Old Man"?
Please do a tutorial for passing out pieces
Hey, amazing post as always. The dedication you put in these is unreal. So I’m having problem recreating the "Another One" Keys sound, would you kindly share the patch for TAL. Thanks a bunch.
Thanks!! Please, make an article about the synth sounds of Porches <3
Hey bro this tuto is awesome! Can you make a tutorial for the song Passing out pieces of Mac demarco?
can this be played throught microkorg?
Hey dude! Thanks so much for this article! Anyway, I’m completely new to the world of synths, but could you explain how mac makes the synth chords sound so huge and warm in ‘on the level’? You did a really good job of recreating the sound but for some reason it sounds so much thicker in mac’s version… Honestly though I don’t know if I’m right or my mind is playing tricks on me though. Anyway, really appreciate all the effort you’ve put into this website!
Mac DeMarco’s recording will sound warmer for a whole bunch of reasons: he’s using a real hardware D50 instead of the sampled software version, he records to tape which adds a lot of warmth and character, and it’s been properly mixed and mastered!
Hey man, great article. I was wondering if you had any ideas on how to get the programming right on my Yamaha DX Reface – idk if you’ve ever played one personally – but I was just looking for some guidelines with the settings. Thanks a lot!
This is Amazing!! Thanks so muchMaybe a part 3 with “passing out pieces” , “one more love song” and “without me”?
The lead in “Without Me” is actually guitar through a lot effects, I think mostly an intense chorus. Also the setting in “One More Love Song” is super similar to the one in “Another One”, so you can probably already do that song with some tiny adjustments.
I think the lead to Another One is actually on a DX7! I have a patch on my DX7 that’s almost spot on. The one you made on TAL U-NO-LX sounds great too! Definitely going to be using that. Thanks so much for this!
nice, is it a preset patch on the DX7? I don’t have a DX7 yet, but yeah it could’ve really been either synth.
Nope, I was actually looking for the patch Mac uses for the lead on Another One, and someone happened to have it and sent me the sysex file. I’ve tried it out on Dexed too and it sounds great!
Would you be willing to share that sysex file?
Really appreciate the hard work you’re doing with this! <3
I've always stuck with presets in my own songs, but I want to learn to create my own sounds. With your posts I try to understand why you do everything and I'm learning a lot. What are your plans for next posts? Toro y Moi or Homeshake would be amazing.
Cheers! Glad they’re helping. Working on a Beach House article at the moment.
You’re a legend! Thank you!