Frank Ocean has recently returned with new music, dropping singles DHL and In My Room, his first new music since 2017. Both tracks are synth-heavy, and see Frank hinting at a bigger club-influence for his upcoming album.
In this article, I’m focusing on Frank Ocean’s latest single, In My Room, as well as going back to the synth sounds in Skyline To from Blonde, and Sideways from the video album Endless. I’ve recreated all of the sounds from these tracks using the Arturia Prophet V, Arturia Mini V and Xfer Serum, and all the patches are available as a free download at the end of the article.
This is a follow-up to my Reverb.com guest article The Synth Sounds of Frank Ocean, where I mainly covered sounds from Blonde. The article was also recently turned into one of Reverb.com’s fantastic ‘Synth Sounds of’ videos with William Kurk.
Sideways
The crystalline synth pad on Sideways, which starts during the outro of Slide on Me, is one of the highlights of Frank Ocean’s video album Endless. The sound is a layered one, with at least two layers building on each other to create a rich wall of sound. The sound is also distinctly digital, reminiscent of 90s digital synthesizers and effects units.
The main synth is a filtered supersaw patch that can be created on modern synths with unison/detune, such as Xfer Serum. Set up a patch with two sawtooth waves, one pitched an octave up, and set the number of unison voices in each to 5 with detuned set between 0.09 – 0.15. Set the filter type to MG Low 24 with a resonance of 27% and adjust the filter as you play to open and close the sound. For effects, add chorus and reverb to make the sound even richer.
I also used D16’s Decimort 2 with 8-bit resolution and the resampling filter set to 7kHz to recreate the digital lo-fi texture of the track. The chords are all major 9th chords (R, 3rd, 5th, 7th and 9th), with the pitchbend wheel used to glide between chords.
- Sideways Pad00:00

For the shimmery layer, I used Soundtoys Crystallizer to process the Serum synth sound on a separate track. Crystallizer takes the input audio, chops it up, repitches it, and delays it, and is perfect for creating ethereal effect layers. For the Sideways effect sound, I set the pitch to 2400 cents (+2 octaves) and the splice time to 1/16ths with no delay. The mode is set to reverse with recycle set to 75% for an extra-rich sound.
- Sideways Crystallizer FX00:00

There are lots of other layered synth tracks in Sideways, which come together to add the textural depth of the track. Some of the layers I can pick out are a gliding riser (recreated using the pitchbend wheel), a soft pulse patch, and some mallet-style keys run through a long, synced delay echo effect. The Serum patches for the riser and pulse sounds are available in the download at the end of the article.
The bass in the recreation was recorded using Arturia Mini V to get a fat, analog-sounding low end. For the stutter effect at 1:24, I used Ableton’s Auto-Pan effect with 100% intensity and shape set to a square wave, which has the effect of rhythmically muting and unmuting the audio, like a killswitch on a guitar.
- Sideways Glide00:00
- Sideways Pulse00:00
- Sideways Mallets00:00

In My Room
Frank Ocean co-wrote and co-produced his latest single In My Room with Michael Uzowuru, known for his work with Beyonce, Kevin Abstract and Vince Staples. The track has a trap beat underneath a plucked synth line riff and Frank’s signature vocal effects.
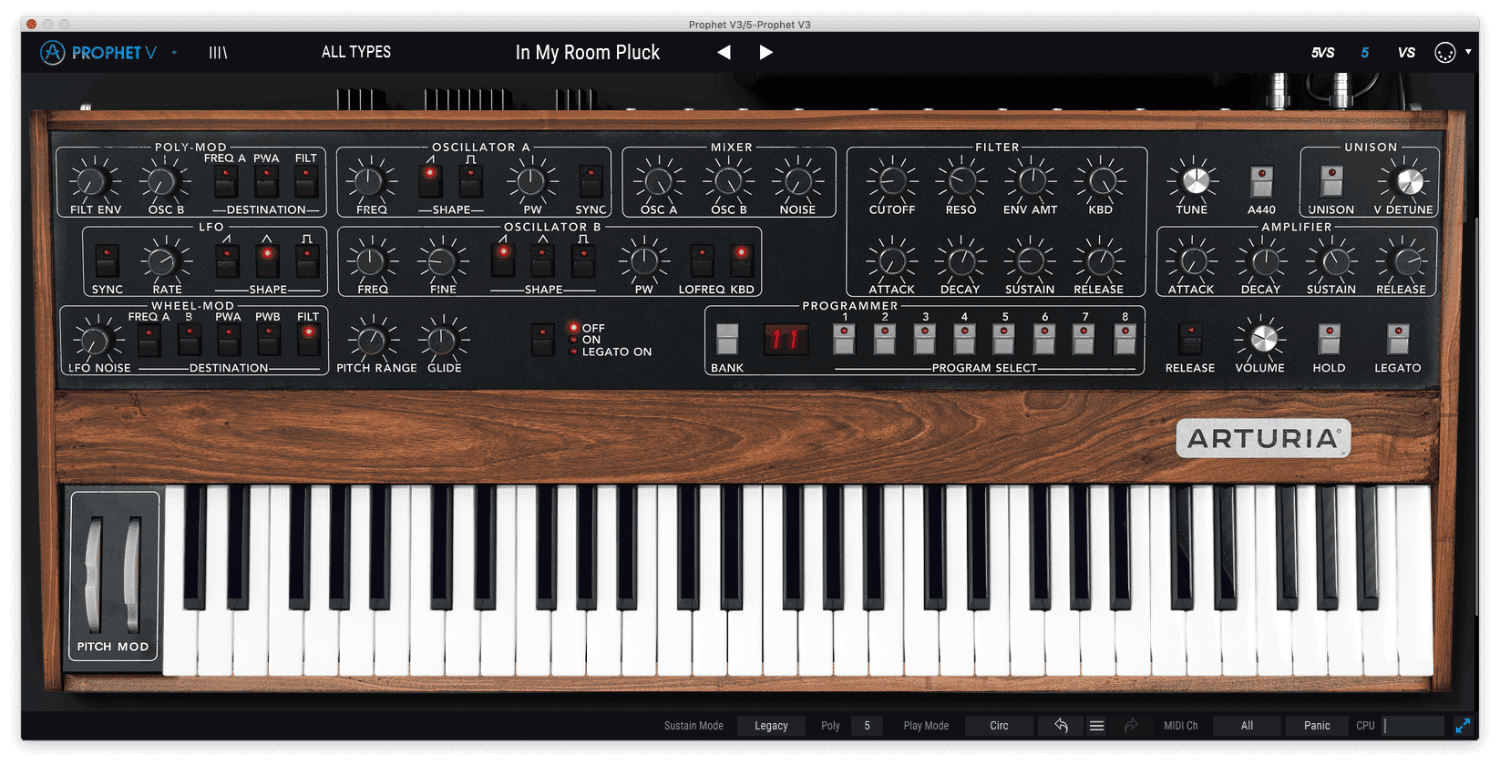
Arturia Prophet V can be used to create both the main pluck sound and the choir line in the background. For the pluck, use heavily detuned sawtooth waves with the fine-tuning of one oscillator set to +22 cents. Set the filter to almost fully closed (30Hz) with resonance set to 2.72 and envelope amount set halfway. Set the filter envelope with a 500ms decay/release and low sustain.
Then, set the amplifier envelope with a 250ms decay, sustain at 0.40, and a long release time of 2.5 seconds. This envelope configuration sustains notes after the filter pluck has been triggered, allowing you to sustain the dark tail of the patch with a sustain pedal while playing.
- In My Room Pluck00:00
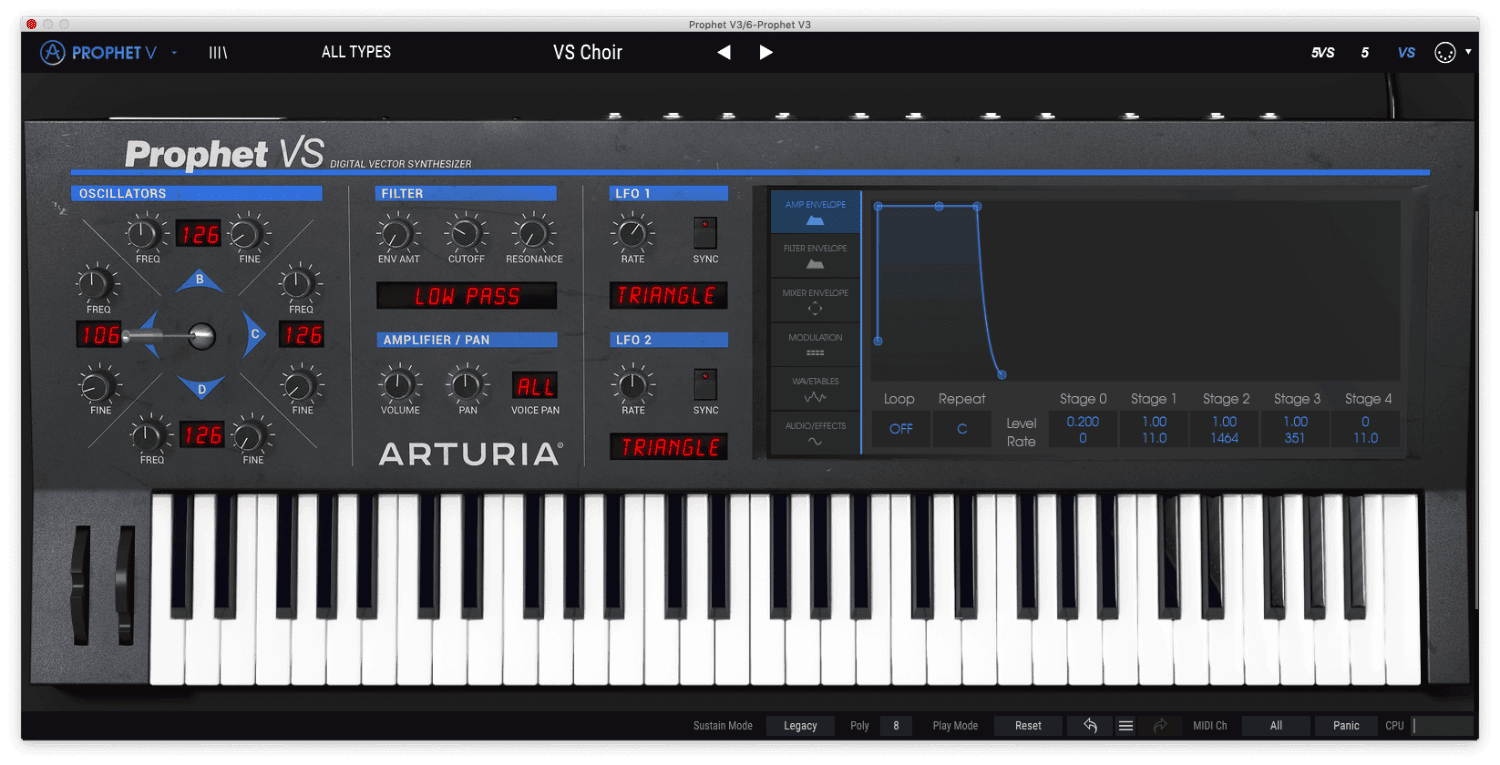
For the choir sound, use the VS mode of Prophet V, which is a vector synth that uses wavetables as oscillators. Move the oscillator selector joystick to the left and in the wavetable tab set oscillator A’s wavetable to 106: fn8. Multiple wavetables can be blended with the joystick to create more complex sounds, but for this sound, we’ll just use a single wavetable.
- In My Room Choir00:00
Here’s the full beat; the track is pretty minimal, especially for Frank Ocean’s standards. The drumbeat is trap-influenced and features a cool laser effect as percussion, which I sourced from the free 99 Drums Pack. An Interesting element missing from the recreation is Frank’s vocals chopped into the beat as a rhythmic layer.
Skyline To
One of the highlights of Frank Ocean’s Blonde is the synth breakdown at 1:41 in Skyline To. The track boasts keyboards by James Blake, drum programming by Tyler, the Creator, and credits Christophe Chassol with ‘Moog solo’, so it’s a good guess that the synths of the breakdown were recorded on a Moog.
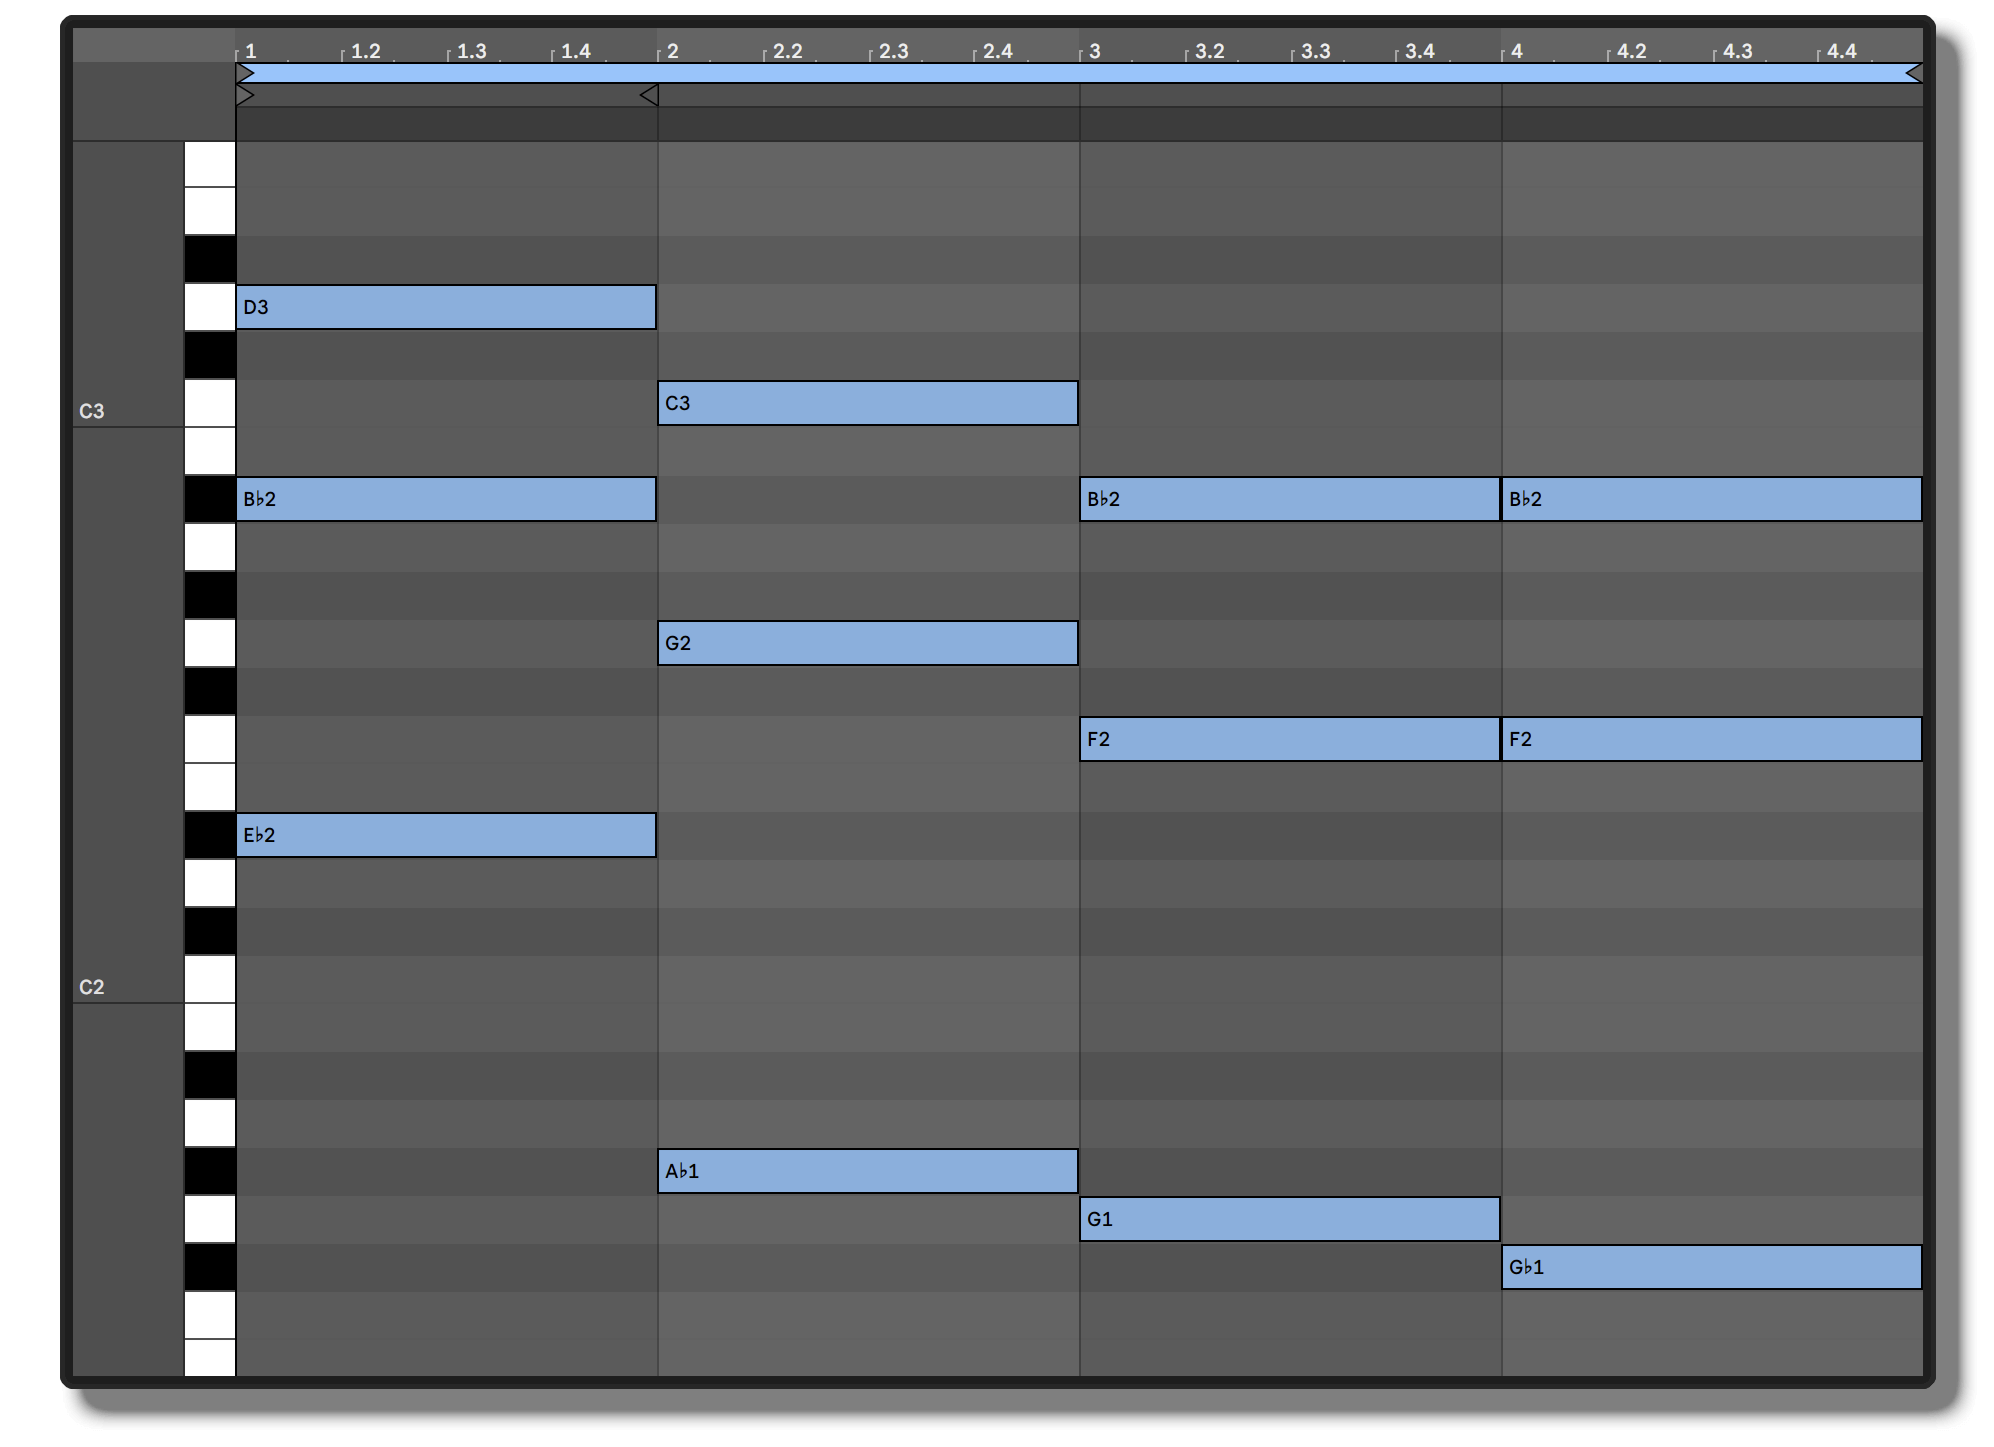
The harmony of the section is very special, with chromatic movement in the chord changes creating a mysterious sound. The chords are E♭maj7 | A♭maj7 | Gm7 | G♭maj7. The first thing to note is the use of major 7th chords, which are great for creating dreamy, ethereal harmonies. The second thing is the chromatic bass movement at the end, with the bass note descending in semitones (A♭ – G – G♭). Between Gm7 and G♭maj7, only the bass note changes, the other notes stay the same. The G♭maj7 chord is a chromatic chord, which is out-of-key in the context of composition, but works as it shares notes with the preceding chord.
- Skyline To Chords00:00
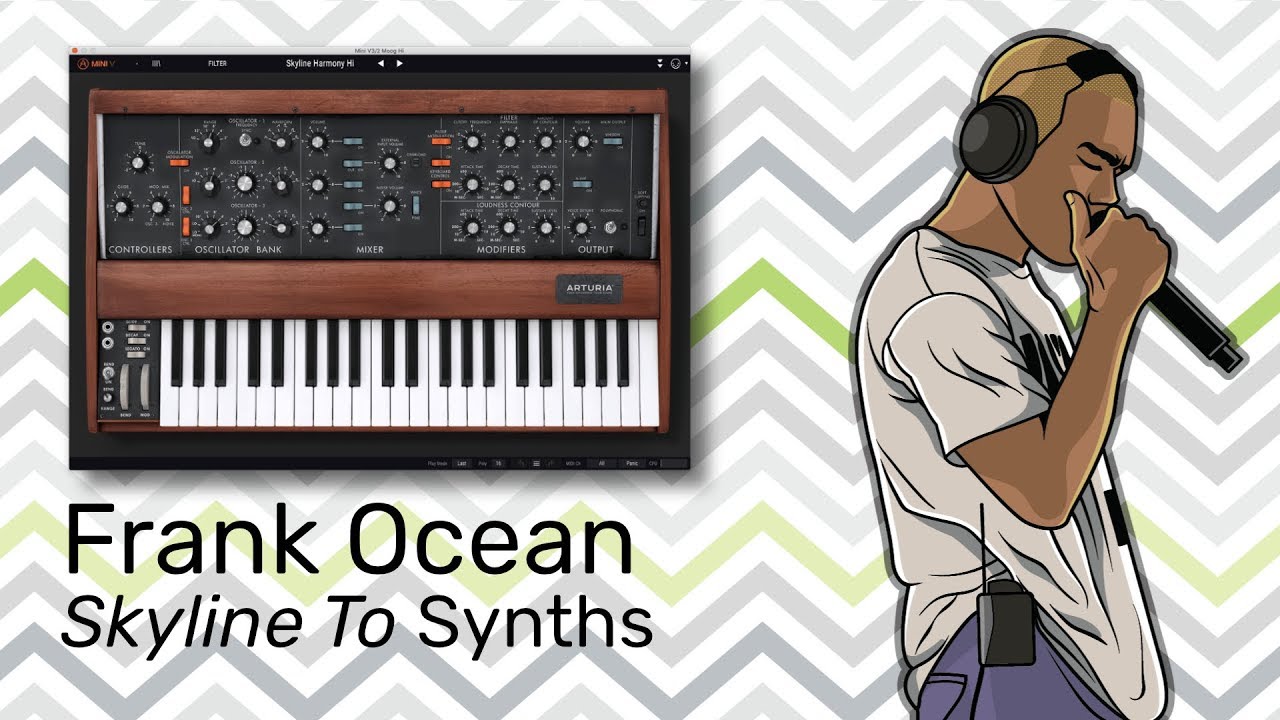
The dusty sounding synth arpeggios are made up of two separate tracks played by two slightly different patches, and I’m using Arturia Mini V to recreate them. The high part uses a combination of triangle and sawtooth waves, with one of the triangle waves tuned an octave high. The filter is set to 300Hz with no resonance or modulation, and the attack envelope has a decay time of 1.5 seconds with sustain set to halfway, to create an electric keyboard contour.
For the lower harmony, use the previous patch as a template but change the waveforms to square and a triangle waves, both tuned to the same octave.
- Skyline To High Harmony00:00
- Skyline To Low Harmony00:00
- Skyline To Full Harmony00:00

The high pitched lead in the background is a Theremin style patch that can be created on any mono synth. The key to the theremin sound is a mellow waveform, long glide/portamento times and some LFO vibrato on the pitch.
For the Mini V patch, I used a single triangle waveform oscillator with the glide time set to 5. The filter is set to 640 Hz with envelope modulation at 40% and filter envelope attack time of 60ms, to soften the sound and creating a subtle fade-in. The LFO is set to 6.52 Hz and modulation amount is set with the mod-wheel, which is set to 80%.
- Skyline To Theremin Lead00:00

All synth layers are washed in reverb and delay to create the spacious ambience of the section. For the remake, I processed the harmonized synths with EchoBoy, an EQ to roll off high-end and low-end, and Valhalla VintageVerb with a 1.45s decay and a mix level of 26%. The guitar in the remake comes from my Gibson Les Paul plugged straight into a Kemper Profiler amp with Soundtoys Crystallizer used to create the washed, ambient background effect.


Hei there, thank you so much, I was looking for the auto pan effect and came by this blog. I love your stuff and thank you for the video!
You’re very welcome!
The patches don’t work when I load them Into my miniv3 or prophet v 🙁
Great post though, super informative
Try updating your plugins
Thank you for this amazing article! Funny enough, Skyline To and Sideways are my favorite produced Frank songs so this was really a Godsend.
I second the other commenter in requesting a Kaytranada tutorial. He’s another big inspiration for a lot of us
Awesome! Love the serum breakthroughs as I use that most! Would love a study on the bass techniques and sound design in some of Ian Ewing’s music!
DO YOU KNOW WHAT VSTS BOYS NOIZE USE FOR "DHL" WOULD BE AWESOME
On Arturia’s mini moog you can add a vocal filter on any synth. Add some chorus and you have yourself a starting point. Also audiothings the orb is a vowelizer vst as well.
This is amazing! Thank you so much, I learned a lot from your articles! This is my fav blog about music.
Could you make article about KAYTRANADA sounds? That would be really great.
Yessss. Kaytranada sounds would also be amazing. Pleaaaseee!!!!