
Future Islands’ sound is built on layers of synthesizers, driving basslines and electronic drum beats. The Baltimore based synthpop band have released five full-length albums, traversing from the punk-like Wave Like Home, the lo-fi loops of In Evening Air, the super-polished Singles, and their latest album, 2017’s The Far Field. Throughout all their albums, the core sound has remained the same. Although they’ve been through several drummers, the combination of punchy basslines, lush synth layers and frontman Sam Herring’s vocal is instantly recognisable.
Future Islands synths are played by Garrit Welmers who also makes music under the name Moss of Aura. Rather than utilising vintage hardware synths, Welmers instead uses software synths in Reason to create all his synth sounds, citing inexpensiveness and ease of travel as the main draws.
His live rig consists of an Akai MPK49 MIDI keyboard, which he uses with Reason, and it’s likely that this is the same setup he uses for studio recording too. His signature sound consists of layers-upon-layers of synth tracks, all complimenting each other to create a cohesive bed of synth tones that sit between the rhythm section and the vocal parts.
As I’m not a Reason user myself, I can’t dive too much into the Reason synths that Welmers may have used, so I’ll instead use some versatile synths to recreate the Future Island synth sound. As always, you can download all the patches in the article for free at the end of article.
“So many people wanna go buy these synths that cost thousands and thousands of dollars. But there’s all this software where you can actually do all this stuff and it’s so much cheaper, and you don’t have to carry around all this stuff. So I started messing around with this software program called Reason and it’s really fun. You don’t have to know anything about anything; you can just get in there and start messing around.” – Garrit Welmers

A Dream of You and Me
A Dream of You and Me is typical of Future Island’s chilled out synth-vibe and is one of the bands few songs with prominent electric guitar. The main synth tracks are the pad that comes in at the introduction, and the bright plucks that play rapid arpeggios in the bridge. For the pad, the main elements are closed filters, a nice chorus effect, and plenty of reverb & delay. You can create the patch relatively easily in any synth, and I’ll use one of my favourites, TAL U-NO-LX.
Set up a patch with a single sawtooth oscillator and close the filter most of the way to darken the sound to almost nothing. Now raise the filter envelope amount to make the patch slightly brighter (but still relatively dark sounding), and then create some movement in the filter over time by setting up the envelope with a medium attack and a long decay. Lastly, run the patch through a chorus effect (like TAL U-NO-LX’s built-in chorus) and some long delay and reverb.
- A Dream of You Pad00:00

At first, I thought the plucked synth was a sample, as it’s too complex too be created by analog synthesisers. However, I experimented with Arturia DX7 V, a digital FM synth that specializes in complex, plucked sounds and managed to build a custom patch using the factory preset 32-KOTO as a starting point, and you can download this custom patch at the end of the article. I ran the track through an EQ effect, adding about 8dB at 3.46 kHz to brighten the sound a great deal, and then ran it through a stereo widening delay, as the part in the original track is quite wide in the stereo spectrum.
- A Dream of You Pluck00:00

This synth pluck is then layered with a guitar playing the same line an octave below – the first time around it’s doubled but the second time you can hear just the guitar playing the melody. Check out the full video to see how these patches work in the context of the full song. The bass is a Fender Precision Bass DI’ed, and the guitar track is a Gibson Les Paul run into Guitar Rig 5’s Jazz Amp, although I think a Fender Strat would’ve sounded closer to the original guitar tone. The drums on the track are from my own Drumtraks Ableton Live kit.

Ran
Ran was the lead single from Future Islands’ latest offering, 2017’s The Far Field. It opens with a drifting synth drone that reminds me of the CS-80 sound Vangelis used on Blade Runner, however Welmers, could be using almost any synth in Reason. What’s notable here is the pitch drift, likely created through using the pitchbend wheel to sharpen the pitch. Here’s the patch in Arturia CS-80 V, although I’ve also included the same patch in Arturia Prophet V in the download at the end of the article. I created a brass preset and used my MIDI keyboard’s pitchbend wheel to control the pitch, raising it a semitone sharp towards the end of the 8-bar phrase. If you check out the video below, you can see the pitch-bending visualised on CS-80 V’s pitch ribbon.
- Ran Drone00:00

The chord parts are layered, with several different timbres recorded playing the same chord voicing throughout. I can identify three patches that are introduced one after the other. The first is the choral patch that accompanies the introductory drone. The second patch comes in with the bass guitar and drums and can be created in Arturia Prophet V with two detuned sawtooth waves and some fat filter movement.
A big part of getting these patches to sound great is finding the ‘sweet spot’ in the synths cutoff, resonance and envelope modulation settings, but using a synth that a wide range of sweet spots also helps! For this patch, I set the cutoff and resonance to 11 o’clock, envelope amount to 10 o’clock, and then set the filter’s ADSR envelope up with no sustain and almost maximum decay, ensuring a long filter decay. Lastly, I used Prophet V’s onboard chorus effect, with the dry/wet level set to 50%.
- Ran Pad 100:00

The last is the brightest and starts playing when the vocals come in. It layers easily with the previous patch as it’s pitched two octaves up, and has a long attack, which helps it differentiate itself from the previous patch rhythmically. Although the patch below looks complex, I really just took one of my own custom string patches, closed the cutoff halfway with high resonance, and raised the attack in the amplifier section to the 3 o’clock mark. Make sure to download the patch at the end of the article!

Balance
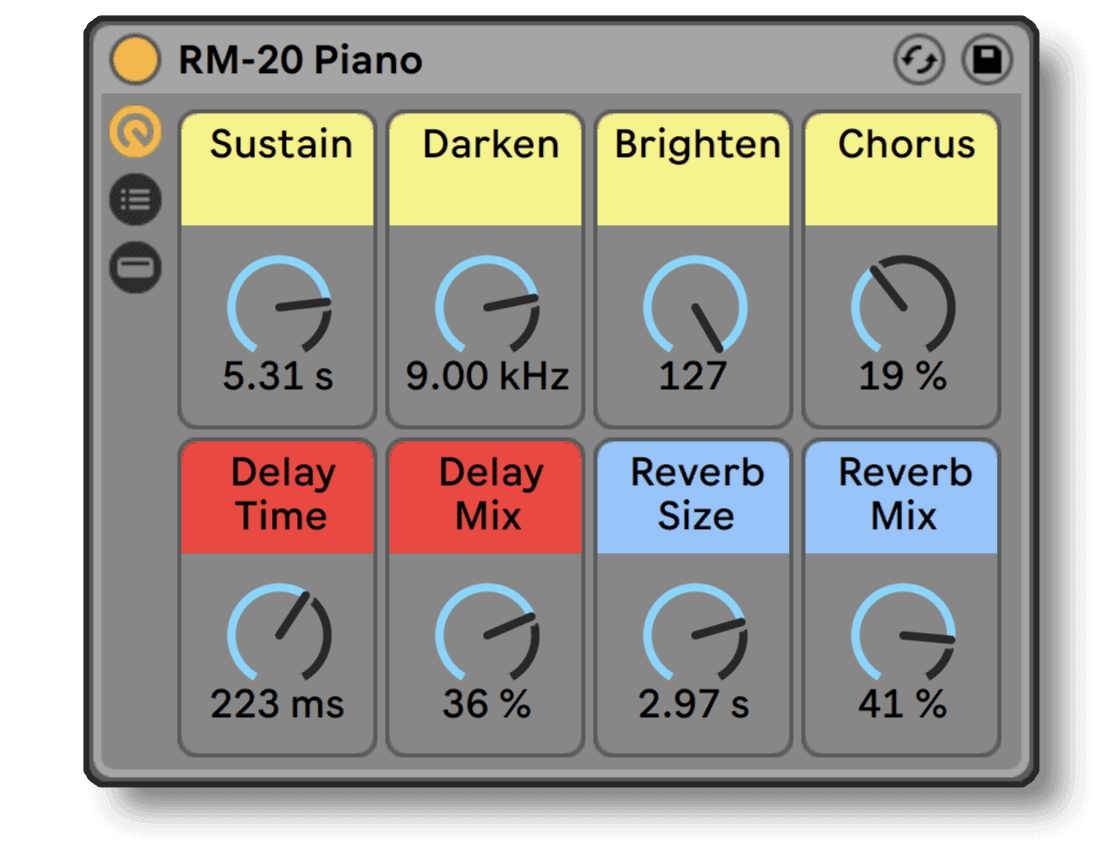
Balance, from the bands third album, 2011’s On the Water, is an upbeat song with some playful sounding synth leads. The song opens with an uncharacteristically organic sounding keyboard part, followed by a synth lead over a toy-like piano chord vamp. For the piano sound, I used the Piano patch from my own RM-20 collection, a sampled collection of sounds from the Yamaha PS-20 keyboard.
- Balance Piano00:00
The main lead synth in Balance is probably the most fun patch in this article, as it has a cool pitch-drop effect, where the note flattens dramatically as the note ends, similar to a particular trumpet effect. This could be achieved with the pitch-bend wheel, although the recording sounds much more natural than that.
I used Arturia Mini V and created a patch where the amplitude envelope also modulates the pitch, with the decay portion of the envelope acting as a release that causes the pitch to drop. To start with, the patch consists of three sawtooth waves, with two significantly detuned. You can create even more detuned voices by using Mini V’s unison mode, raising the polyphony and setting voice detune to halfway, although bear in mind that this will significantly raise the volume of the patch.
Use the modulation matrix to send the VCA envelope to the VCO pitch, and set the modulation amount so that the pitch is raised by a semitone (0.0358 in Mini V). In modern synths like Serum and Massive, you have multiple extra envelopes that you can use for even more control. Set the envelope with no attack, full sustain and a decay time of around 420ms. Now the patch is set up, but everything is going to sound a semitone sharp, so compensate for this by setting the global tuning a semitone flat (-2.000, or the -1 mark in Mini V). Note that using a tuner really helps when coming up with these patches!
- Balance Detuned Lead00:00

The second lead is a sparkling synth patch that uses a high resonance in the filter. For patches with high resonances, be careful setting the amount as well as the filter modulation, as small adjustments can create very different sounds. The patch is a sawtooth oscillator and a square-wave oscillator, with the sawtooth pitched an octave up. In the mixer, lower the volume of the square-wave oscillator to about 25%, which will send mostly the octave up sawtooth oscillator to the filter. Set the cutoff to the 1 o’clock mark and resonance to 12 o’clock, and add a small amount of envelope modulation. I found lowering the keyboard tracking helped turn down the harshness of this patch, and a long release time on both envelopes also sounded good. To dirty the sound up a bit, run it through some saturation and amp modelling plugins; I used Ableton’s built-in Amp effect on the Clean setting, with the treble turned all the way down to 0 and dry/wet set to 50%.

Long Flight
Long Flight is one of my personal favourite Future Islands tracks, and it comes from their 2010 album In Evening Air. The song opens up with a lo-fi flute sound, reminiscent of a Mellotron flute sound (think Strawberry Fields Forever!). Synth flutes seem to be a favourite of Welmers, as two flute patches come up in Seasons, which I’ll cover next. The sound has been processed with lo-fi effects, so figuring out the original patch is difficult.
For flute sounds, a mix of triangle and sawtooth waves are suitable, and to create the breathy effect you must close the filter to mellow out the sound and use an attack time of around 80-100ms in both the filter and amp envelope to create the illusion of a player blowing the note. For effects, I applied a high-pass filter at 350 Hz, used Ableton’s Amp with gain and bass turned to 10, middle and treble set to 0 and mix set to 40%. I also used Echoboy as a tape sim and ran the whole track through a big reverb.
- Long Flight Dry Synth00:00
- Long Flight Lo-fi Flute00:00

The metallic pad in Long Flight can be created with narrow-square waves, which in Prophet V is done by turning on the square wave oscillator and setting the PW knob. Lower the filter cutoff to 1 o’clock and set resonance to around 10 o’clock, which helps to add a little brightness to the patch.
In the amp section, set a long attack (400ms) and release (1700ms) to create an ambient pad-style effect where notes take a while to trail off. I again ran this through a highpass filter set to 350 Hz, which really helps the bass and drum tracks cut through the layers of synths. Check out how all the tracks sound in the video!

Seasons (Waiting on You)
Future Islands’ most well-known song is Seasons, and it’s made up of layers of lush synths. At its fullest, the song has at least 5 different synth tracks playing, and what makes them work together is their variation in tone, from dry 80s stabs and washed reverb pads to thin sounding synth-flutes. There are two sounds in the opening, the first being the songs memorable opening hook.
You can create this sound in TAL U-NO-LX, and the key is a moving filter with a medium-high resonance. Set up a new patch and set the sub-oscillator volume to just below halfway. Set the high pass filter to 4 and the low pass filter’s cutoff to 1, its resonance to just over 5 and its envelope amount to 8.
Now raise the ADSR’s decay time to 6, and set the VCA mode to envelope. For the final touches, add a small amount of vibrato by raising the LFO fader to about 1.5 and the LFO’s rate fader to 7, on free mode. Turn on the chorus I effect to add chorus to the sound and run it through a minimal amount of delay and reverb to keep the sound quite dry.
- Seasons TAL Plucks00:00

This patch is doubled by a flute-like layer that helps add some high-end colour to the melody. Arturia Prophet V has a few great flute presets, and you can use the patch Pro5 15-Flutes as a good starting point. Set both this and the first track to receive the same MIDI notes and you can easily create a doubled part. I ended up high-pass filtering the flute track in the final recording to clear up some of the bass end in the synth layers.
- Seasons Flute Layered00:00

This hook is backed by our first pad sound, a very thin, resonant layer which we can again recreate in Arturia Prophet V. Use two sawtooth waveforms, one pitched an octave above the other, and detune one of the oscillator’s fine-tuning by about 7%. Set the filter cutoff knob to the 2 o’clock mark and the resonance to 11 o’clock. Set the amplifier section’s decay to 780ms and the sustain knob to 2 o’clock.
Turn on Prophet V’s chorus, set to mode 2 with the dry/wet knob at 50%. Run this patch through more reverb and delay than the TAL U-NO-LX patch, to position it further back in the mix. If you play this patch on its own, it doesn’t sound particularly great, however, it works amazingly as a background pad layer.
- Seasons Intro Pad00:00

When the drums come in, another synth pad starts playing, and it’s very similar to the TAL U-NO-LX pad we created for A Dream of You and Me, with the only adjustments being that you want to add the sub-oscillator with 50% volume, raise the HPF level to 50% to help it layer better, and boost the resonance slightly to make it brighter.
- Seasons Rich Pad00:00

Lastly, there’s the flute-like synth that plays when the vocals come in. This is a dirty flute sound, and can be achieved by setting the fine-tuning of oscillator B to 20%. which creates a detuned effect similar to two flutes being played at the same time, slightly out-of-tune with one another. You can boost this effect by running the patch through a chorus effect such as Prophet V’s built-in chorus to create the illusion of even more flutes!


Really great content. Greetings from Chile!
Having some problemas though with the installation (I am new in the midi world), is there anyt instructiones in any site to read how to install these patches?
I need Analog Lab to run them?
Sorry the dumb questions.
Keep the good work, reallye apreciate it, huge Future Islands fan.
You need TAL U-NO-LX to open the .pjunoxl files and Arturia Prophet V to open the .prox files.
If you have Analog Lab V, you can use this download, which has the Future Island presets in an Analog Lab bank – https://reverbmachine.com/sounds/synth-sounds-collection/
i want to post 10000 x 🙏 !
This is absolutely amazing, exactly what I have been looking for for a year at least. Thanks for all the effort 🙂 I recomend you to explore the sounds on "Spirit"
Fantastic work, been searching for a page like this a while on how to construct sounds and patches. Do you know of any other sites they do the same as yourself? And also will your patches work in logic?
this blog is amazing.
great job as always. have you thought about doing everything everything?
Not really, honestly their music is very complex and I’d have a tough time transcribing it. Love their sound though!
Amazing . Much love, discovered a great new band